One of the most important things on a hike is your boots. If your boots don’t work, not much else matters. You need real trekking boots, not sneakers or “trail runners.” But we can’t tell you which boots to buy. The essential elements you need are ankle support, a stiff sole, and waterproofing – and you need the boots that meet all these criteria and fit comfortably. And remember, they need to fit with liner socks and your hiking socks, so that’s what you need to wear when hiking more than 100 miles in your boots to break them in. (We mean it!) Walk around in them, making sure they don’t crease on the top. Toes crammed? Too small. Heel slipping? Too big. Then take them home and wear them around the house only. If you find they don’t fit and you haven’t scuffed them by walking outside, you should be able to take them back; confirm with the store before trying!
Hiking boots
In order to safely participate in your many practice hikes as well as perform to your potential while climbing Kilimanjaro you must have a pair of appropriate hiking boots that fit you properly, are comfortable, waterproof and provide adequate ankle support. The boots you choose may be the most important bit of equipment you bring with you out on the trail, so it is very important that you research what brand and fit works best for you. We highly recommend shopping for your boots at a reputable outdoor store; one with a knowledgeable sales staff who can assist you with fit, form and function of your potential new hiking boots!
There are three key characteristics to look for in a pair of trekking boots: fit, quality, and function. Let’s deal with each characteristic below:
Fit: The best way to test good fit is while wearing your hiking socks, place your foot in the boot and slide it all the way forward until your toes hit the front of the boot. Then take your index finger and slide it down the back of the boot between your heel and the boot support. A perfect fitting boot will allow you to squeeze your finger in without too much resistance. If you cannot squeeze your index finger down the back of the boot, then the boot is too small. If you find that your index finger fits too easily into the back of the boot, then the boot is likely too big. A snug fit, with your index finger in the back of the boot, is just right.
Quality: Good quality doesn’t have to be expensive; in fact you can get some affordable trekking boots that are great quality. Good quality boots all have the following design features:
- A medium to heavy weight boot should have high tops for steady ankle support, a sole with high rubber content and deep lugs for better traction. But keep in mind that, while heavier weight boots tend to have better durability and cushioning, the extra weight of the boot becomes a consideration. If that’s the case,a medium weight boot might be another option.
- Waterproofing is the standard today but it’s important to get boots that use GoreTex or like material for improved protection from moisture and the elements.
- A lacing system should incorporate D-rings and speed hooks for better ankle support and fast lacing
Function: Once you have obtained a proper fitting pair of hiking boots that have similar characteristics to those outlined above, the task now is to break your boots in. Do not, under any circumstances, arrive in Tanzania with brand new hiking boots that you have never worn. The best way to break boots in is to wear them as often as possible before your trek date. In the months and weeks before your trip you should be wearing your boots on your many training hikes so the inner soles of the boot start to contour the bottom of your foot; this way you can be confident that your boots are comfortable and well-worn in.
By following these general clothing guidelines and recommendations, coupled with your own research and personal preferences, you should now feel confident to shop and select the correct and proper attire for your Kilimanjaro adventure!
Layering
Layering is a relatively simple concept. All it involves is combining a few pieces of outdoor clothing in such a way that they can be quickly and easily adapted to a variety of weather conditions and your level of activity. Your daily trek will start in the damp cold of early morning, then blossom into warm and sunny days but it is always possible that the skies might open up in the middle of your hike with rain, snow or even hail! While walking on the trail, you will be generating plenty of heat but once you stop moving you will begin to get cold. An appropriate layering system keeps you comfortable in all of these situations and all you really need are three parts to a system: a base layer, an insulating layer and an outer shell.
Base Layer
The function of the base layer is primarily to wick moisture away from the body so it can evaporate, keeping your skin warm and dry. A base layer is integral to staying comfortable in the outdoors. We suggest that you have two base layer choices; a light-weight one and a heavy weight one. Make sure they are sized properly so on summit night you can wear both together comfortably. Your base layer can also perform double duty and be used at night as sleepwear. Synthetic fabrics such as polyester, or polyester blends are preferable, however Merino wool offers more warmth than synthetic material of the same thickness, and it is still comfortable on warm days.
Insulation Layer (mid-layer)
Your base layer retains warmth, depending on how heavy it is, but thermal insulation isn’t its primary function; that’s what your mid-layer is for. The mid-layer can be a fleece pullover or synthetic insulated jacket both which retain heat by trapping warm air close to your body. Down insulation is the most compressible and the warmest, but must be kept dry, while synthetics aren’t quite as thermally efficient as goose down but they insulate better in damp or sweaty conditions and cost less. Make sure your insulation layer is large enough to fit over both your light-weight and heavy-weight base layers when you wear them together.
Hard Shell
Your shell jacket is the all-important protective layer in your system; this thin jacket must be totally waterproof and totally windproof. The key here is a waterproof/breathable fabric that allows water vapor and heat to escape the jacket as you perspire. If sweat and moisture build up on the inside of the jacket, you’ll end up wet even if it’s effective at blocking rain and precipitation from reaching your body, which defeats the purpose. It is important that your shell layer can compress very small and weigh very little so you can carry it with you every day in your backpack. Plus it needs to be large enough to fit over your double base layer as well as your insulating mid-layer.
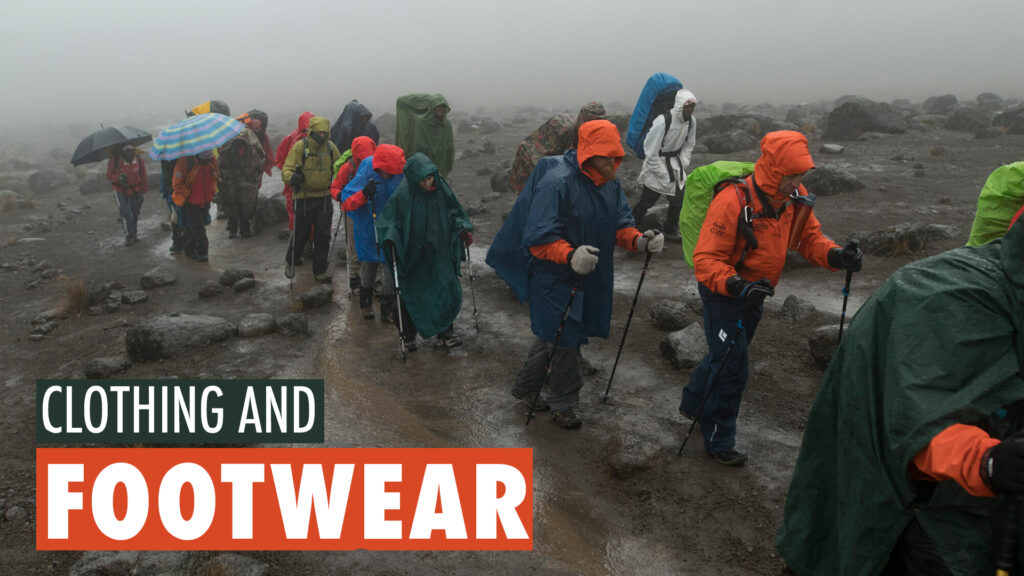
Rain Gear
An important component of your layering system is proper rain gear – both a poncho and pants which, when used together and in tandem with your layering system, will ensure you stay dry, safe and comfortable during inclement weather. If you encounter heavy, hard rain for an extended period of time (which can happen in mountain climates), a poncho is a small item that will protect you, your shelland your backpack. The key component of your rainwear fabric is a coating or membrane that does the technological trick of blocking rain while also allowing sweat vapor to escape. Because it’s relatively delicate, a membrane will be bonded to a protective fabric to create a laminate. Almost all rainwear is made using either a laminate or a coating, though the exact materials in each will vary. You can choose the style and decide on a cost, but be sure to size it properly so it can fit over all of your clothing when layered properly. While a poncho is a great option, it will not cover and protect your lower legs from getting wet, so again rain pants are always a must. On your summit night attempt, your guides highly recommend you dress in four layers: two base layers, a light and mid-weight, one insulation layer, and finally a hard shell layer. It is important that all the clothing you select is large enough to be worn together in this manner.
Socks
Much like your footwear, the socks you wear on the hiking trail can also have a significant effect on your comfort. Your socks should be made of synthetic materials that enhance moisture-wicking performance and absolutely not made of cotton! For your Kilimanjaro climb, you will need several types of socks. On summit night, you will likely want to wear several pairs, so just like your clothing, make sure you are able to layer your socks. You might consider the following sock styles:
- Lightweight hiking socks: These socks are best for warmer conditions, stressing moisture wicking and comfort over warmth. They are relatively thin, yet are warmer and provide more cushioning than just sock liners alone.
- Mid-weight socks: These provide cushioning and insulation in moderate to cold conditions, with adequate padding built into high-impact areas like the heel and the ball of the foot.
- Mountaineering socks: Mountaineering socks are the thickest, warmest and most cushioned socks available. They are designed for long trips, tough terrain and cold temperatures.
- Liners: Sock liners are thin, lightweight wicking socks designed to be worn right next to your skin. These liners wick sweat away from the surface of your foot to keep you dry and comfortable. Liners Also limit the amount of abrasion between your outer sock and your skin. They are designed to be worn under other socks.
Gloves
Gloves must be a component of your clothing system and provide an important level of protection and comfort when you hike in adverse conditions. You should bring multiple pairs for different functions that can be combined as needed. Fleece gloves are a great base layer glove because they stay warm when wet and because your body-heat can dry the perspiration that accumulates in them while you are hiking. Thin gloves also help preserve your manual dexterity, allowing you to open zippers or take photos with your camera. Oversized rain mitts can be added to your glove system and are worn over fleece gloves. These act as a wind barrier and help retain warmth. The last tier of your hand protection is your summit gloves and the ones you will be wearing to the top of Kilimanjaro. These are oversized, usually waterproof/breathable gloves that often come with a very warm, insulated glove liner. These gloves can also be worn over one of your higher breathability gloves, even if they’re wet or damp, and will still provide insulation for your hands.
Hats
On your eight day Kilimanjaro trek you will need several types of headgear. You will want one hat that shields you from the harmful effects of the sun and provides you with 365 degrees of protection, such as a sun hat or baseball style cap, and a second that provides warmth, such as a ski cap or beanie. Wool hats tend to be warmer than synthetic, fleece, or acrylic ones but many people find them itchy. Synthetics dry faster when they get wet and weigh a few ounces less, but unless they have a soft-shell outer layer, the wind can whip right through them. Hybrid wool and synthetic hats are very popular and combine the best features of both. Another option is a balaclava. A balaclava or ski mask is a form of cloth headgear designed to expose only part of the face. Depending on style and how it is worn, only the eyes, mouth and nose, or just the front of the face are unprotected. To round out your headwear, we also suggest you bring along a buff or bandana to use as a head covering, a neck gaiter or as a personal hygiene item.
Gaiters
Snow, water, dirt and pebbles have a way of getting into even the most waterproof of boots. To prevent this from happening consider using some type of hike gaiter. Gaiters cover the vulnerable tops of your footwear to fully protect your feet from the elements. Gaiters come in many styles, but we recommend a waterproof, ankle- or mid-calf height.